Follow on Bloglovin

Thursday, May 31, 2012

ABC Baseball


Here's a really fun game you can play at the end of the year with your preschoolers, or any time of the year with older students (the big Kindergarteners!). When I taught Kindergarten, I used to play this game with one of my grade level teachers, and our classes loved the friendly competition, socialization, and added physical activity during the school day.

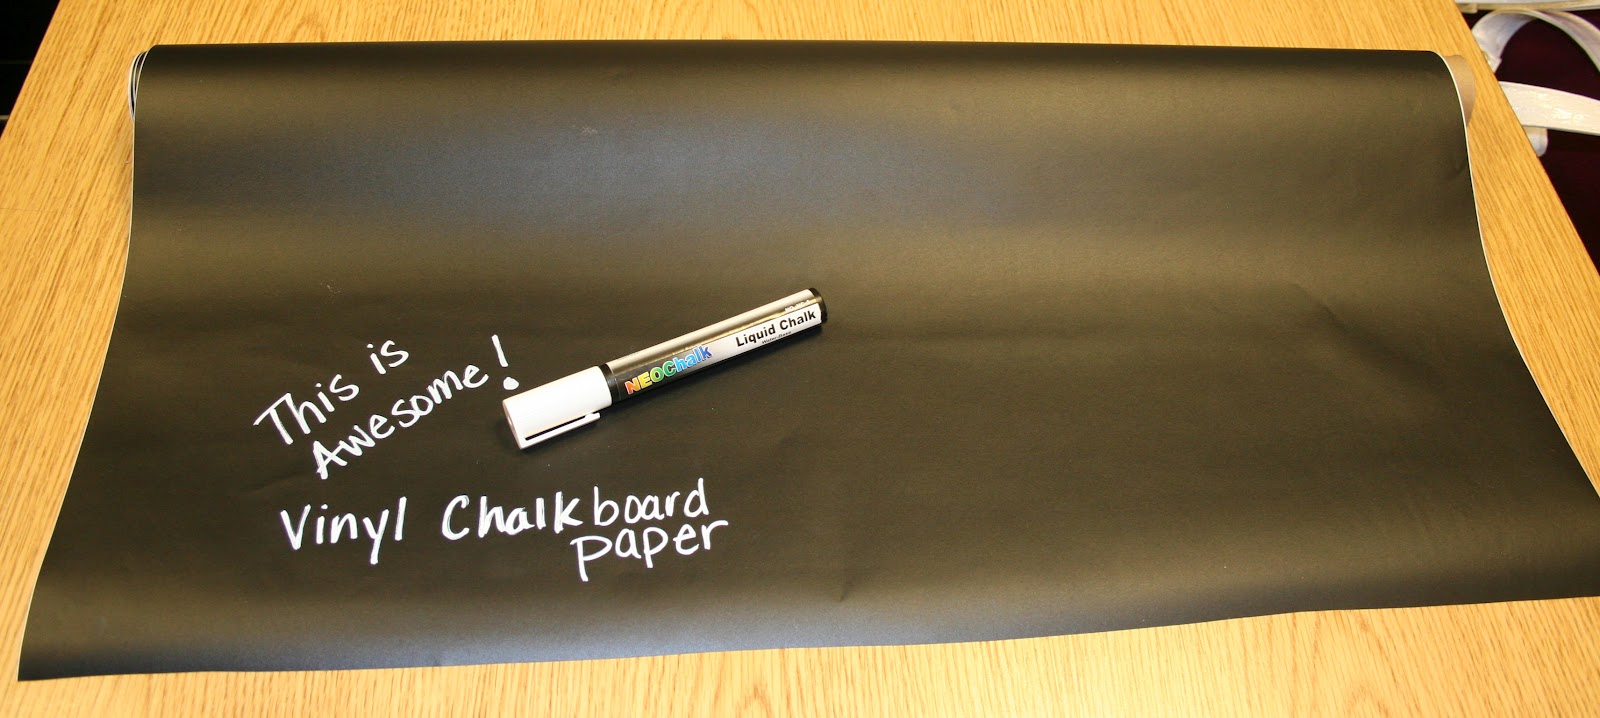
We all know that if there is a way to make a game out of learning, your students will buy into it---creating a highly engaged group of students with a high interest activity. All you need is the baseball letter match game (which is a complete set of upper and lowercase letters), a dry erase board & marker (or something to keep score), bases/home plate and an excited group of students!

ENTER FOR A GIVE-A-WAY ON MY TEACHER'S NOTEBOOK SHOP!
Starts May 31, 2012 and ENDS at midnight!
10 LUCKY WINNERS WILL RECEIVE THIS PRINTABLE----FREE!!!


Click Photo


So....once you have printed the baseballs, you will want to put a number (1, 2, or 3--to represent the value and what base they could run to) on the back BEFORE you laminate. It's up to you, but I put a 1 on easy letters, a 2 on more difficult letters, and a 3 on the letters that are typically most difficult for students to identify. Then, laminate & cut out.

Now, you are ready to take your students to the gym or outside for a game of ABC baseball! I found some great bases and a home plate at the Dollar Tree, but I've only seen them there twice in the Spring over the paste few years. You could always make your own, or borrow from your P.E. teacher!

Set up your bases and divide your class into 2 teams, or bring another class to play against you! You will not need any players in the field. Simply have your students sit on the baseline until it is their turn to "bat" (no bat needed, though!). The teacher is the pitcher! :)

Have your baseballs in hand, and call one student up to bat. They stand at home plate and you tell them if it's a single (1--1st base), a double (2--2nd base), or a triple hit (3---3rd base). Then, "pitch" the ball (show them the ball with the letter on it). If they identify it, they run to their designated base. Next batter, do it all again. Every time a player crosses home plate, make a tally mark for a run for your team.

The team with the most runs at the end is the winning team!!

Shake it up! How to vary the game depending on each child's needs. When you pitch you can:
* show only uppercase
* show only lowercase
* mix it: sometimes show a capital letter, sometimes show a lowercase letter 
* ask for letter sound
* ask for a word that starts with that letter
* ask for a word that ends with that letter
* only use the letters in the child's first name


I hope this game is a HOME RUN for your class!
Have FUN!

Wednesday, May 30, 2012

Classroom DIY

My new post as a contributing author on Classroom DIY is now up for you to see!! Click HERE to go check it out! There are so many great DIY projects, and more will be coming your way every day!!


Classroom DIY

Saturday, May 26, 2012

SOS! SOS! Math Manipulatives

Welcome back to Super Organizing Saturday! SOS!

Is there anyone else out there that doesn't know what to do with all those math manipulatives? If you are an early childhood teacher, you definitely have A LOT of objects that you use for your students to practice a variety of concepts such as counting, 1:1, patterning, adding, subtracting, and more! It's not an easy thing to keep track of all those small pieces, or store them when you students are not using them.....UNTIL NOW!

I finally found a way that will work for me AND will look nice and neat whether inside a cabinet (which is where I keep my manipulatives) or on a countertop or bookshelf. This technique may work for you as well. All you need are some 5-drawer plastic units from Wal-Mart (they are cheaper there), chalk vinyl, and a chalk ink pen! Here we go with me and my chalk vinyl again. But if you've been keeping up with me, I DID order that 50 yard roll (and my 12 yard share) ----so I am putting it to good use already.

It was WAY easy, and is going to work like a charm! What do you think? Weigh in with your thoughts, and any other suggestions that you have for organizing your math manipualtives/counters!


Have a HAPPY MEMORIAL WEEKEND!!!


Friday, May 25, 2012

Dinosaur Math Theme Pack


Having fun with a spring Dinosaur theme?! I usually do some sort of dino theme that fits in with what we are learning because kids find dinosaurs simply fascinating! They love learning about them, and have tons of questions about how they became extinct, why they became extinct, and all the different types. 

And the end of my unit, I do a dinosaur DIG. A "real" one! 
Could I find any pictures of this? NO! I think they are on an old computer that I am yet to remove all my files/documents. Bummer.

Anywhoooo----if you want to have your own dino dig, just visit your local butcher! Yes, the butcher! They will probably be more than happy to hand over some very large cow bones for your little paleontologists! A very nice butcher will boil them or put them on a smoker to make sure that the bones are free of all meat and grimey stuff before you bring them to school. If not, just have them bag 'em up and have your ever-understanding and more than willing to help, husband, do it! :)

To be really effective, you have to arrive to school VERY early. I brought my paraprofessional partner in crime with me, 2 shovels, and we started digging holes all over the playground.Not very deep---but deep enough to make the kids work for it. Once that first bone is discovered, it kicks them all into high gear and they don't stop until I have to call off the dig! Have your camera ready for those very surprised, wide-eyed, looks when the children pull out those GIANT bones. They are big, and heavy, and so believable. There's no harm in a little embellishment, is there?!

To get your students ready for the dig, tell them a story about how long, long, long ago it was heard that dinosaurs roamed <insert school name here> school playground. Tell them you don't know if the stories are true or not, but you asked the principal, and s/he thinks it might be true and gave us permission to conduct a research dig! * I recommend telling them at the very end of the day when they are ready to go home, so that they don't go digging during recess or something. Then, when they return in the morning, they will be pumped up for the dig!

This dig will quickly become the buzz of the whole student population in your building! You'd be surprised how many 5th graders buy into the idea that preschoolers acutally found dino bones on the playground! Too cute!

Other tips for a successful dig
* Ask a parent volunteer to pick up the bones and/or bury them
* Get permission from your administrator so that they are on board and approve you digging up an area of  
   the playground
* Contact your butcher ahead of time, find out what day they slaughter (sorry, I know it sounds awful), and
   arrange to pick up the bones shortly after so that they do not have to have them sitting around long.
* Make sure the bones are in a plastic bag when you pick them up from the butcher, and when you dispose
  of them. They can be stinky---especially if they are smoked. They do attract flies/animals...just FYI.
* Count your bones (I had one for each student)...and double check at the end. No need for raccoons,
  dogs, etc. to invade the playground later on. Ewwww.
* HAVE FUN! GO ALL OUT---THEY WILL ALWAYS REMEMBER THIS EVENT!!!

Now that you are all pumped up...
Get your dinosaur stomp on with this AWESOME

Lots of great skills for all your little learners!
Pattern cards
Addition & Subtraction work mats w/ recording sheets for accountability
Counting Mats
"Go Stomp"
Memory
Number recognition
Number sequencing
AND MORE! 


Get it HERE!

Baseball Math Pack & a FREEBIE!

It's baseball season, and I love it! It's one of my favorite sports, so there's no question that I am thoroughly enjoying the fact that my kids are old enough to play catch in the yard, play on the community baseball teams, and like the sport as much as I do! It's so much fun. Here's 2 out of 3 of my little sluggers...


Just because it's baseball season, and you undoubtedly have some students who are on teams this summer, I've created a FREEBIE for YOU! Kids generally get so hyped up about team sports, and look forward to their game all day while at school. Integrate and corral that extra-curricular enthusiasm into your math stations!

Click below to grab your freebie and check out my PreK-K math pack as well. It's full of lots of great items that you may find useful in your classroom, too!


Get the 29 page pack HERE!


Get your FREEBIE Here!


Monday, May 21, 2012

Classroom Freebies- Manic Monday FREEBIE


Classroom Freebies Manic Monday
I've linked up with Classroom Freebies - Manic Monday Freebies! YAY! There are a TON of great things, so I know you will find something you love!

Here is my FREEBIE to you! It will always be free right here! Come back and grab/download it any time.

Enjoy your summer (if you are already on vacation)---and hang in there if you are still counting the days! Freebie linky parties should make it a little more fun while you count down! :)


Saturday, May 19, 2012

Webinar: File Cabinet Rebellion!

Join me, Keri Powell, and Tiffany Ouwinga - both elementary teachers devoted to organized and efficient classroom management and instruction-- for our new webinar this TUESDAY!! If you missed our presentation at MiAEYC in March...here's your chance to get in on it! Lots of great ideas to organize various aspects of your classroom at any time of the year. Under $20....register ASAP, as there are a limited # of attendees available! :)

We hope to see you May 22 (Tuesday) @ 6:45pm!


Register HERE
Just $19.00, and 45 minutes of your time for a jam packed session to jump start your organization! Good for any time of the year---but summer is nearly here, and you can really focus on your room!


~Keri 


Here's what teachers have said about this presentation:

D'Lynn
Keri,
I loved the presentaion at the MiAEYC conference! I have to say it was my favorite! You both did a great job and I am so excited to implement your ideas. Thanks for presenting and sharing your knowledge!
APRIL 1, 2012 9:22 AM 
Hi Keri!
I attended your session yesterday and it was AMAZING! Your presentation was by far the best of the entire conference. You and Tiffany are an inspiration: both as educators and organizing queens!:) Thank you so much for sharing your talents. I'm off to go work on labeling with my chalkboard vinyl! ;)
Sincerely,
Wendy (Preschool teacher)


Hi Keri,

I just wanted to send along a quick message to you and your colleague following today's presentation at MiAEYC. I was the consultant sitting in the front and am a self confessed organizational junkie! I loved your session and your energy. You ladies did a fantastic job! I promise to check out your blogs and follow...feel free to do the same since my contact info is below. Keep up the great work and thanks for the goodies today!

Taking a break!

I actually did some organizing in my classroom yesterday.....but did I take pictures? Nope....I forgot! *sigh*.

Today is a gorgeous day in Michigan, and I plan on spending it all outside with my family and perhaps doing a bit of crafting and painting that I've been wanting to get to. Everyone needs a break once in a while---and today, the teacher hat comes off!

Stay tuned....I have plenty more SOS! ideas and posts coming your way!! Have a great weekend, everyone!

Thursday, May 17, 2012

Classroom Library---Get it together!

So, how do you organize your classroom library? How many ways have you tried, and how many classrooms have your scoped out looking for ideas?! Yep---been there, done that. 

Well, my dear friend and colleague, Tiffany, introduced me to the answer to our library prayers! I am so excited to begin cataloging all my books with my iPhone! To be honest, I have not yet done it. But, I have set up my account, and the reviews look great! 

Best of all, it's FREE!!!!!!! You know you all love that! If you get to this before I do, don't forget to report back on how you like it. I'd love to hear. And, I'll put in my 2 cents, as well! YAY! 


Monday, May 14, 2012

Measure It Out!

Toward the end of the year, many students are working on units of measure. If you're not, maybe you can find somewhere in your math stations to review measuring with this cute little activity, Mouse Measuring!

I dug this out, after not using it for a year or so, and it held the interest of their eager little minds just as I remembered! Whether you are working on measuring with non-standard units of measure, or standard units, this activity is for you! You can use it either way. I love activities that grow with the children---you know you are getting great use out of it!


With this game, you will get mice labeled A-R. All you have to do is laminate the mice, cut out, & punch a hole in the black dot and attach yarn of various lengths to make a "tail". Only one tail per mouse, of course! 


If you are working with preschool students, you may only want them to measure with non-standard units of measure and opt out of the recording sheet. There were certainly a handful of my preschoolers at the end of the year who could measure and then write the numeral next to the corresponding letter mouse. (i.e.: we used unifix cubes and if the mouse A was five cubes long, they could practice writing "5" by mouse A on the recording sheet). 

If you are working with older children who are capable of measuring, and then completing the recording sheet, go for it! 


Mouse B is 6 quarters long! 
To see this game in my Teacher's Notebook shop, click HERE! 

Saturday, May 12, 2012

SOS! SOS! Super Organizing Saturday - Flash Drives

Do you ever use flash drives to store your documents and then go back to find something, and you can't find it because:

A. You forgot what you named the document...
B. There are so many items on the flash drive that you can't possibly sift through them all efficiently...

Unless you take the time to create folders, and name everything "just so"....there's a good chance your flash drive is a cluttered mess. Flash drives are meant to grab and go---no one wants to spend time organizing them, I know!

Not to worry---here's one way you can spend some time organizing your flash drives once and for all and then you'll be able to use these little devices in the most organized and efficient manner!! We're all busy people, efficiency is important! Read on....


You'll want to start with having a few flash drives on hand....and perhaps some 3-ring binders.

Photo borrowed from Google Images
I forgot to grab a photo of my own binders at school---so these will have to do. They look pretty organized! In my classroom, I use a binder for each of the themes or concepts that I teach. For example, I have binders for monthly themes, and a binder for measurement, etc. In the binder, I store any lessons, re-producibles, activities that will fit inside, vocabulary cards, and more.

THEN----I also have a corresponding flash drive that goes inside EACH binder. My #1 tip is that you only put related information on ONE flash drive. So----if I am working on my "Down on the Farm" theme binder, I will need a "Down on the Farm" flash drive, in which I only store documents and information pertaining to that specific theme. 

So---however many units of study, concepts, or themes you have....you will want that many flash drives. It seems excessive, and perhaps expensive (unless you grab for 4GB drives on SALE for $4.99 like I mentioned the other day). But once you get everything in its rightful place, you will be able to easily locate your documents to quick make extra copies, for planning, and staying organized and efficient! 

I also do this for any committees that I work on. Each committee that I am involved in gets its own binder, and a flash drive to sort out that information. If the committee work is not piling up high, you could combine them on one flash drive - provided you create a folder on the flash drive to keep the information separated.

Now---how do you keep track of all those flash drives floating around? EASY! They should not be floating around everywhere....you can place them right in the binder! Take a little velcro dot and place it on the bottom of the flash drive, and another velcro dot in the binder - and you've created a spot where the flash drive cannot get lost! OR---you can get this cute little holder HERE!


When you are planning, headed to your grade level meetings, taking work home for the weekend, or off to a committee meeting---simply grab your unit binder and all of the contents will be well organized and with you when you need it!

PS---this is a project that requires your focus and attention. If you don't use binders right now and want to begin, it is a big under-taking. You will want the summer to work on it!! It took me about 2 weeks to switch everything from my file cabinet to organized theme binders and to put everything on a thumb drive!

Ready for your binders to go paperless?? Even better if you are brave enough to let go of the hard copies! Check out LIVEBINDERS.COM! Grab some lesson plans from other teachers, or upload your own into a web-based "3-ring binder". Get organized "virtually" anywhere! :)

Will flash drives be on your Christmas Wish List or school supply list this year? Happy organizing!!!

Friday, May 11, 2012

Chalkboard Vinyl

If you have not yet discovered chalkboard vinyl and all that is great and good about it....let me tell you, you are totally missing out on a really amazing product!! I featured chalkboard vinyl in a previous post about creating prop boxes. It is one (of many) ways to label things. It is by far my new favorite labeling system!

Awhile ago, my friend & colleague Julie, from Make, Take, Teach featured my new love in one of her blog posts. You can see the post HERE.

Photo Credit:Make, Take, Teach Blog & Julie Van Alst

I use self-adhesive chalkboard vinyl in both my home and classroom in a variety of ways. It is removable and re-positionable, and can sustain washing by hand! Incredible right?! 

Here are all the ways that I use it in my home/classroom:
* On the refrigerator (or door, cabinet, etc.) to write reminder notes
* On student mailboxes/cubbies to label with their names
  (have a student move out and a new one move in? Simply erase with a damp cloth and re-write!)
* Label boxes, bins, storage containers
* Label containers in my kitchen pantry
* Use as a calendar
*And MUCH MUCH MORE! 

So----I just got a new 50 YARD (HOLY COW!) roll in the mail today! I went in with 3 other teachers and bought the mother load! We each get 12.5 yards, and I am SO SO very excited! 

Another talented friend and colleague of mine is also dearly in love with chalkboard vinyl! She has an entire Etsy shop devoted to LOTS of ways to use chalkboard vinyl. She has many cute labels in different shapes and designs, and shows you how to use them in a variety of ways. There's no need to order a roll of vinyl and do all the cutting yourself---when you can buy everything pre-cut from Lake Effect Treasury. She takes custom orders, and I am sure she'd be happy to hear your needs for your classroom.

If you were lucky enough to attend the MiAEYC conference this year in Grand Rapids, MI.....my Co-presenter and I were giving away sample packs of these labels from Lake Effect Treasury. Those who attended the conference LOVED the samples, and a few ladies commented on ordering classroom sets for the fall. Imagine how much trouble you can save yourself by not purchasing name tags, labels, and writing, laminating, cutting out, and adhering student names everywhere! This is a really great time saver and should give you something fun to do over the summer as you prepare for your new batch of students!

There are a bazillion cute and crafty ways to use this product on Pinterest. I am sure that you, too, will find it all very "Pinteresting"!!! If you already have, or decide to go get some chalk vinyl, don't forget to grab yourself some Chalk Ink markers (liquid chalk pens)----AND let me know how you used to product in your classroom!!! 

Happy crafting and labeling! 

Chalkboard vinyl can easily be cut using scissors or a Cricut (or other die cutting machine)---I bet your mind is reeling with possibilities and designs by now! 

HAVE FUN! 

Tuesday, May 8, 2012

Extend Social Opportunities During Summer Break!

Summer is nearly here, and school will soon be out of session!! This year, you have worked so hard to establish and help maintain friendships amongst your students. You have presumably created a classroom community, and a warm and caring environment. It's always difficult at the end of the year when we sit back and wonder what will happen to all of our hard work while the students are on vacation! Here's one small way you can try to extend all that hard work you have invested in your students' social learning.

I use this every year in my classroom when we have graduation and/or a family picnic/activity day. I simply place these forms on the tables (pre-cut in thirds) to allow families to informally exchange information in hopes of setting up some play dates over the summer. 

Not only will your students continue to practice their social skills, they will maintain close friendships with a few students! As parents and families begin to get to know each other better it creates a networking and collaborative effort that can benefit the school as well. Perhaps when two moms meet up one will encourage the other to volunteer at the school in some capacity, maybe some Dad's will team up and coach summer T-ball together----who knows! The possibilities are endless.

Sometimes it is hard to step out of your comfort zone and meet new people. However, when I show my students what these forms are for....they eagerly introduce their parents to their friends (whom the families have undoubtedly been hearing about all school year!)---and swap contact information in a relaxed setting driven by their wildly excited children! 

It's one small gesture that we can provide for our students and families---and then easily sit back and enjoy a good book while catching some sun in your backyard...all while knowing your work never ends, and it is oh so sweet! 


To get your copy....please click the photo above! 


Monday, May 7, 2012

Hurry---Run (or drive) to Office Max!!!


I have to preface this post with a disclaimer that Office Max has no affiliation with me or my blog----but this was such an awesome find today, that I had to share it will all of you! 

Currently on sale at Office Max, you can get a 4GB flash drive for $4.99 (regularly priced $19.99)---that's a huge savings, obviously! I happened to find them at the register when I checked out today, and I bought 2! Get yours before they run out---and tune in on Saturday to S.O.S (Super Organized Saturday) right back here at my blog to see how I use flash drives to organize my technology & resources with these awesome little devices! 

YAY! 

Wednesday, May 2, 2012

Classroom DIY

I am happy to announce that I will be one of 25 selected contributors to a new blog - Classroom DIY! I have seen so many fantastic Pinterest inspired projects, and so many wonderful ideas posted on blogs from a ton of phenomenal teachers. We are all on the DIY bandwagon, and Charity Preston of The Organized Classroom Blog is launching Classroom DIY that is going to take you by storm this summer! If you know Charity, you know that she has been named the "Fairy Blog Mother" in the blogging world. She has (and still is) helping so many bloggers get started. She's certainly a talented teacher and blogger with a lot to offer all of us!

I am so excited for all the great ideas that are coming your way in one great location! Each contributing author will have one post per month. You will see new ideas and DIY projects every day from 25 different authors/teachers! There will be fantastic tutorials for each that include step-by-step photos and/or videos. So easy----so FUN! SO INSPIRING! 

With summer right around the corner, you will want to stay current on this blog! Don't miss out! 
Please look for MY contributing articles on the 30th of each month! I can't give out too many details right now....but begin to familiarize your self with the Classroom DIY blog and be ready on May 1st!!!


Classroom DIY

Tuesday, May 1, 2012

We have chicks! Peep, peep, peep!


We were SO VERY EXCITED to see 3 new baby chicks when we came to work this morning! Our little preschoolers are going to be thrilled!! Here's our first 3 newborns!


Ms. Schneider and I really get WAY too excited. Are we at an unhealthy point in this project when we accessorize our clothing to welcome our chicks?! The shirts say "Shout out to my peeps!"

Ms. Schneider even brought in cupcakes so that we could have a birthday party for the chicks!!
Happy Birthday!!! Happy Chick Day!!! Check out more photos/videos below!


Want chick activities for your classroom? Click HERE