YAY! I am so excited....I'm working on making my own classroom decor set this year, and here's my newest project---welcome & name banners! I think these will be a great addition to my "sweet shop" decor theme. It makes me want to get in my classroom and get things decorated---but the 70+ degree weather makes me want to sit in the sun and read a book! I LOVE summer...and I love these little projects between chapters!
Click photo to see this banner in my TN Shop!
Here's my welcome banner in pink and lime green
with an orange polka dot ribbon!
Click Photo
AND...
Here's my name banner---in a matching pattern!
Click Photo
I am excited to make use of these banners as a great big welcome to the students, parents, and staff that come in my room. As long as there is a sufficient learning/teaching in the classroom---there's nothing wrong with having things super cute and creating a personalized space that reflects your personality! After all, you are there at least 6 hours a day, and some weekend time usually--it's important to create a unique space that reflects who you are, your personality, and style!
I love hearing when parents or administrators comment on what an inviting classroom I have created! It is one of my main priorities at the beginning of the school year...it sets the tone and atmosphere for the type of learning environment that I want my students to have. Their comments confirm that all the effort into my classroom decor has made them feel warm and welcome from the moment they arrived---exactly how I want my students to feel---then, we can start making it "our space".
A classroom is a community, a family, and home away from home---I like to make it an aesthetically appealing place for me & my students to be! Besides....I love decorating, and it's downright FUN!
Join me, Keri Powell, and Tiffany Ouwinga - both elementary teachers devoted to organized and efficient classroom management and instruction-- for our new webinar this TUESDAY!! If you missed our presentation at MiAEYC in March...here's your chance to get in on it! Lots of great ideas to organize various aspects of your classroom at any time of the year. Under $20....register ASAP, as there are a limited # of attendees available! :)
Just $19.00, and 45 minutes of your time for a jam packed session to jump start your organization! Good for any time of the year---but summer is nearly here, and you can really focus on your room!
~Keri
Here's what teachers have said about this presentation:
Keri, I loved the presentaion at the MiAEYC conference! I have to say it was my favorite! You both did a great job and I am so excited to implement your ideas. Thanks for presenting and sharing your knowledge!
I attended your session yesterday and it was AMAZING! Your presentation was by far the best of the entire conference. You and Tiffany are an inspiration: both as educators and organizing queens!:) Thank you so much for sharing your talents. I'm off to go work on labeling with my chalkboard vinyl! ;) Sincerely, Wendy (Preschool teacher)
Hi Keri,
I just wanted to send along a quick message to you and your colleague following today's presentation at MiAEYC. I was the consultant sitting in the front and am a self confessed organizational junkie! I loved your session and your energy. You ladies did a fantastic job! I promise to check out your blogs and follow...feel free to do the same since my contact info is below. Keep up the great work and thanks for the goodies today!
So, how do you organize your classroom library? How many ways have you tried, and how many classrooms have your scoped out looking for ideas?! Yep---been there, done that.
Well, my dear friend and colleague, Tiffany, introduced me to the answer to our library prayers! I am so excited to begin cataloging all my books with my iPhone! To be honest, I have not yet done it. But, I have set up my account, and the reviews look great!
Best of all, it's FREE!!!!!!! You know you all love that! If you get to this before I do, don't forget to report back on how you like it. I'd love to hear. And, I'll put in my 2 cents, as well! YAY!
Do you ever use flash drives to store your documents and then go back to find something, and you can't find it because:
A. You forgot what you named the document...
B. There are so many items on the flash drive that you can't possibly sift through them all efficiently...
Unless you take the time to create folders, and name everything "just so"....there's a good chance your flash drive is a cluttered mess. Flash drives are meant to grab and go---no one wants to spend time organizing them, I know!
Not to worry---here's one way you can spend some time organizing your flash drives once and for all and then you'll be able to use these little devices in the most organized and efficient manner!! We're all busy people, efficiency is important! Read on....
You'll want to start with having a few flash drives on hand....and perhaps some 3-ring binders.
Photo borrowed from Google Images
I forgot to grab a photo of my own binders at school---so these will have to do. They look pretty organized! In my classroom, I use a binder for each of the themes or concepts that I teach. For example, I have binders for monthly themes, and a binder for measurement, etc. In the binder, I store any lessons, re-producibles, activities that will fit inside, vocabulary cards, and more.
THEN----I also have a corresponding flash drive that goes inside EACH binder. My #1 tip is that you only put related information on ONE flash drive. So----if I am working on my "Down on the Farm" theme binder, I will need a "Down on the Farm" flash drive, in which I only store documents and information pertaining to that specific theme.
So---however many units of study, concepts, or themes you have....you will want that many flash drives. It seems excessive, and perhaps expensive (unless you grab for 4GB drives on SALE for $4.99 like I mentioned the other day). But once you get everything in its rightful place, you will be able to easily locate your documents to quick make extra copies, for planning, and staying organized and efficient!
I also do this for any committees that I work on. Each committee that I am involved in gets its own binder, and a flash drive to sort out that information. If the committee work is not piling up high, you could combine them on one flash drive - provided you create a folder on the flash drive to keep the information separated.
Now---how do you keep track of all those flash drives floating around? EASY! They should not be floating around everywhere....you can place them right in the binder! Take a little velcro dot and place it on the bottom of the flash drive, and another velcro dot in the binder - and you've created a spot where the flash drive cannot get lost! OR---you can get this cute little holder HERE!
When you are planning, headed to your grade level meetings, taking work home for the weekend, or off to a committee meeting---simply grab your unit binder and all of the contents will be well organized and with you when you need it!
PS---this is a project that requires your focus and attention. If you don't use binders right now and want to begin, it is a big under-taking. You will want the summer to work on it!! It took me about 2 weeks to switch everything from my file cabinet to organized theme binders and to put everything on a thumb drive!
Ready for your binders to go paperless?? Even better if you are brave enough to let go of the hard copies! Check out LIVEBINDERS.COM! Grab some lesson plans from other teachers, or upload your own into a web-based "3-ring binder". Get organized "virtually" anywhere! :)
Will flash drives be on your Christmas Wish List or school supply list this year? Happy organizing!!!
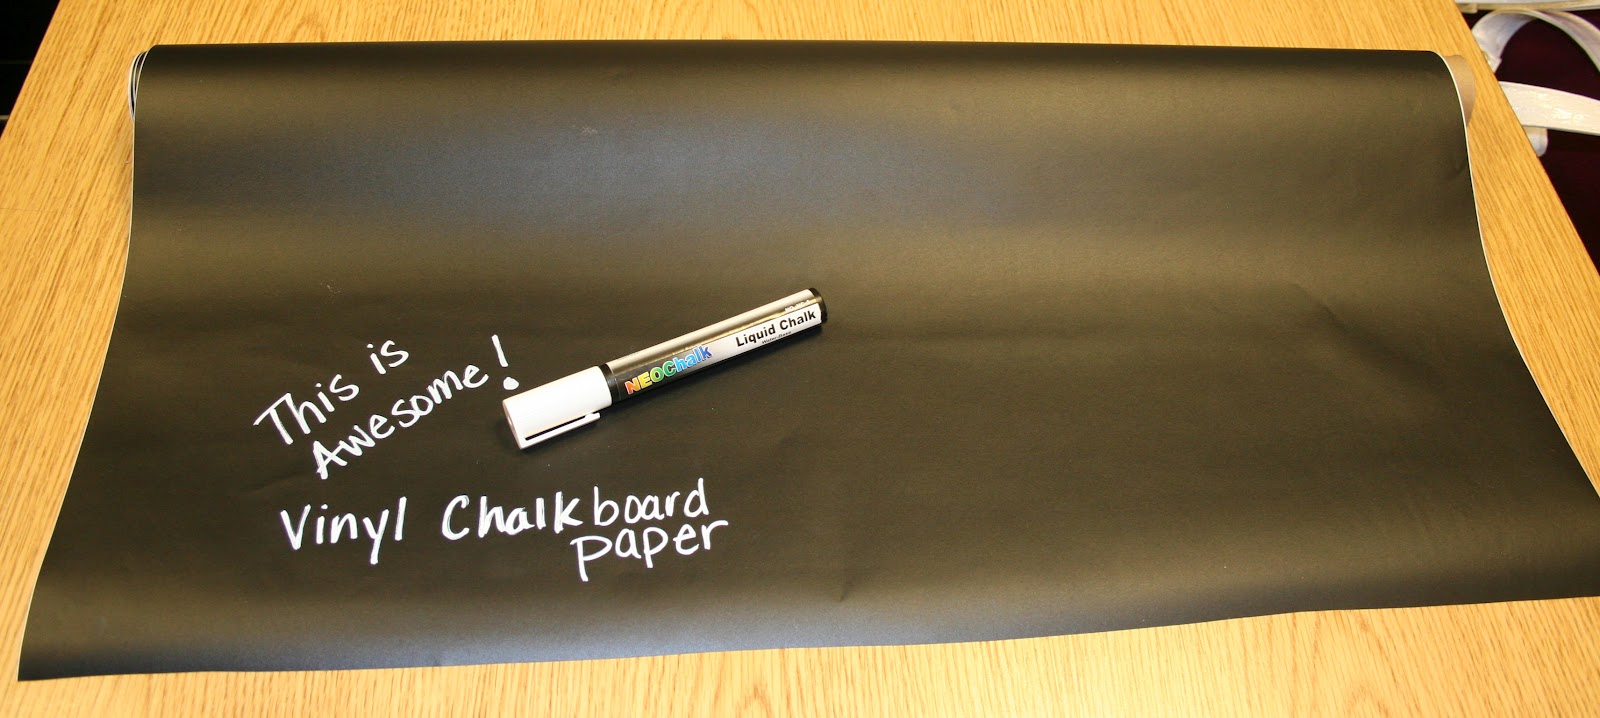
If you have not yet discovered chalkboard vinyl and all that is great and good about it....let me tell you, you are totally missing out on a really amazing product!! I featured chalkboard vinyl in a previous post about creating prop boxes. It is one (of many) ways to label things. It is by far my new favorite labeling system!
Awhile ago, my friend & colleague Julie, from Make, Take, Teach featured my new love in one of her blog posts. You can see the post HERE.
I use self-adhesive chalkboard vinyl in both my home and classroom in a variety of ways. It is removable and re-positionable, and can sustain washing by hand! Incredible right?!
Here are all the ways that I use it in my home/classroom:
* On the refrigerator (or door, cabinet, etc.) to write reminder notes
* On student mailboxes/cubbies to label with their names
(have a student move out and a new one move in? Simply erase with a damp cloth and re-write!)
* Label boxes, bins, storage containers
* Label containers in my kitchen pantry
* Use as a calendar
*And MUCH MUCH MORE!
So----I just got a new 50 YARD (HOLY COW!) roll in the mail today! I went in with 3 other teachers and bought the mother load! We each get 12.5 yards, and I am SO SO very excited!
Another talented friend and colleague of mine is also dearly in love with chalkboard vinyl! She has an entire Etsy shop devoted to LOTS of ways to use chalkboard vinyl. She has many cute labels in different shapes and designs, and shows you how to use them in a variety of ways. There's no need to order a roll of vinyl and do all the cutting yourself---when you can buy everything pre-cut from Lake Effect Treasury. She takes custom orders, and I am sure she'd be happy to hear your needs for your classroom.
If you were lucky enough to attend the MiAEYC conference this year in Grand Rapids, MI.....my Co-presenter and I were giving away sample packs of these labels from Lake Effect Treasury. Those who attended the conference LOVED the samples, and a few ladies commented on ordering classroom sets for the fall. Imagine how much trouble you can save yourself by not purchasing name tags, labels, and writing, laminating, cutting out, and adhering student names everywhere! This is a really great time saver and should give you something fun to do over the summer as you prepare for your new batch of students!
There are a bazillion cute and crafty ways to use this product on Pinterest. I am sure that you, too, will find it all very "Pinteresting"!!! If you already have, or decide to go get some chalk vinyl, don't forget to grab yourself some Chalk Ink markers (liquid chalk pens)----AND let me know how you used to product in your classroom!!!
Happy crafting and labeling!
Chalkboard vinyl can easily be cut using scissors or a Cricut (or other die cutting machine)---I bet your mind is reeling with possibilities and designs by now!
It's Super Organizing Saturday once again! I have come to love these mornings this Spring...not too hot outside, a little chilly....not missing much if I stay inside and organize something! This week...it's my assessment binder for basic concepts. That's right....we're talking about assessments on a weekend. I know, I know, I know....that's a heavy topic for such a fun day of the week. If you agree, you might need a large cup of coffee. I'll wait----you grab yours, and I'll grab mine!
Ok, I'm ready! Here we go!
When I organize my assessments, I of course do not use manilla folders, hanging file folders, etc. If you've read my posts before, you've probably heard of my File Cabinet Rebellion of 2011, in which I ditched any and all file cabinets or file cabinet "accessories". I loathe file cabinets----and I LOVE binders!
So, you see where I'm going with this.....and you can infer that I organize my assessments in a binder!
Here is the beloved binder that holds all of my assessments. I was lucky to have my district supply me with everything that I needed. This binder contains:
My curriculum/State objectives....
Letter Identification assessments...
Letter/sound identification score sheets
Beginning sound assessment & score sheets
And much more! However, there are always those basic assessments that are not supplied by the district or curriculum - but are so necessary to early childhood. It is usually up to the grade level teachers, or individual teacher to create their own assessment and find a way to record the information every marking period or during progress monitoring.
For me, I certainly needed to update my assessments/record keeping. I've taken the time to create these assessments based on my classroom needs---and perhaps they can work for you as well! All you need is a large 3-ring binder, page protectors, and a color printer. If these assessments work for you, feel free go grab them HERE....at no cost to you!
Do you have a spelling center in your classroom? In Pre-K, I have an ABC Center---same thing, but leveled for my LITTLE friends and based on the alphabetic principle. I'm not sure how many upper elementary classrooms have a spelling center, but I sure would hope so! BIG kids like to move around and learn, too! Get your students out from behind those desks/tables and interacting with a peer, moving letters around, AND working on weekly spelling lists! Your kinesthetic/visual learners will be grateful!
This center can be a permanent station in your room, interchangeable with a cookie sheet, oil drip pan as a magnetic work space, on the side of a file cabinet, or in a little box that can be pulled off a shelf and taken to a comfy spot on the floor, etc. I made a spelling center for a fourth grade teacher last year, and was later told how much the students LOVED IT!
Here's some pics of how you can easily create an ABC Center activity or fun and cute spelling center, in which students can be social, free to move letters around and play with them, produce a product (recording sheet of their words that they made), and work on weekly spelling lists.
Here's the recording form that students can use to write the words that they have spelled!
Younger students can practice spelling basic CVC words that they might be familiar with: mom, dad, cat, dog. They can also spell their friends' names.
I have vocabulary cards in pocket charts in my ABC Center for such words so students can copy and re-create with magnetic letters. I'm sure you do, too! This activity is the same concept, but with different visuals---change it up! With your older students, replace simple CVC words or names of classmates with vocabulary or spelling lists!
Here, I've put this activity/station on a oil drip pan. You could use space on your wall, back of a bookshelf, cookie sheet----or anywhere, really! I love magnetic items compared to velcro. :)
Here, only a few of the letters are shown---but with this activity you will get a large selection of uppercase, lowercase, and lots of vowels in order to spell a variety of words.
Look! One of my preschool students has spelled "car"! Too cute!
I hope you can find this activity useful---and if you do not yet have an ABC or spelling center in your classroom---grab and oil pan and lots of magnetic stuff---it's an easy way to get started! You can build up from there!! Want it? Click HERE (or--see below for ways to get it FREE!)
**If you are a current follower, or a new follower, invite a friend to join/follow my blog, and you BOTH get this activity FREE! Just comment/E-mail me to let me know who you are and who you invited (or who invited you!).
Thank you for stopping by!! I'd love to hear about some upper elementary spelling centers/stations if there are any out there!! :)
If you are getting to know me through this blog, or already know me in person, you have come to know that organizing is a hobby of mine. My guilty pleasure. It may be a bit geeky......but that's okay. I know right where all of my belongings are, it's aesthetically appealing, and I know right where all of my belongings are! (Yes, I said that twice-----it's important!)
As an early childhood teacher, I have lots of props and extras that keep things new and exciting for the students. Again, most of my things are theme related (Forgive me, Dan Hodgins----who is speaking in my home town today---but I am home cleaning my house!) If you have read Dan's writing, or listened to him at a conference, you know that he is not crazy about themes. He says we don't live in themes---so why would we teach in themes?
Well, I don't know. I kind of sit on the fence about this. I mean, I sort of do live in themes! When I decorate my house, I have a theme in mind----it makes everything flow nicely. The main living areas of my house have a country/vintage type look...with some modern accents. My paint colors coordinate, my accent pieces all tie in the same colors, etc. In my bedroom, we went for a more modern look---shabby chic. Again, the colors coordinate, my accent pieces are carry the same modern "theme" in colors, style, etc. Each of my children's rooms has it's own theme----my youngest son likes vintage license plates. His wall decor, bedding, curtains, etc. all reflect that theme and color scheme. My oldest son has gone with a "rock star" theme, and my daughter----it's pink, pink, pink with polka dots and owls. Themes, themes, and more themes!
In a truly 4-seasons State, we decorate our house according to the seasons. I have fall decor and dishes, winter/Christmas, summer, etc. In school, we are able to see and talk about all these changes in weather. It is a great part of who we are in Northern Michigan. We see the leaves changing colors on the trees, the snow, the new growth that spring brings, and the beautiful summers. Each of these changes brings on real life experiences that our students live in their every day lives----camping, boating, raking leaves, building igloos in the snow, planting and gardening, etc.
AND----some students may never get to experience family vacations to the ocean, quality time raking leaves and talking about the science behind the color changes, planting a garden or flowers at home, etc. It depends on the family's priorities, likes/dislikes, income, ability to travel, level of education, etc.
So - basically, it's this in my mind: If students are living through so many changes that bring up a variety of related topics and interests, then we SHOULD explore them in the classroom. And if students are NOT experiencing some very interesting topics (such as a trip to the ocean, or the antarctic) then I should be able to "take"them there through a deep thematic unit of study in my classroom. Some educators say why? I say, WHY NOT?!
We teach children to read, to use their schema, their life experiences, their imagination, and create a movie in their mind. What if you are reading about the Arctic? Most children have never been there, maybe some have seen a few clips on Animal Planet, maybe a couple have seen a penguin in a zoo, but really---what other background information do they have? Probably not much. UNLESS----a certain teacher has given them opportunities (even if it's manufactured in the classroom with plastic toys and props) to explore the Arctic in a multi-sensory, cross-curricular study in the classroom. And really, isn't cross-curricular just a form of thematic study?
So again, I say....Themes---why not?! And if you do, or will in the future, how will you ORGANIZE all your thematic items and props. Think back to your first couple years of college. You probably had a class that made you create a "prop box". Mine probably looked like a joke back then....but here's my sophisticated version, and my current organizing system for thematic props.
I simply use various size clear totes with lids and a label!
I also put a materials list on the inside of the lid.
If there are consumables that get ruined or used, I can easily remember what I need and re-stock!
I also jot down an idea of how I used the materials previously.
If it works, and the students like it, I'll do it again unless a better idea comes along!
Do you teach in themes? If not, I'd love to hear your reasons for or against it.
It's Super Organizing Saturday----and I mentioned on my FB page that there would soon be a tip for how to store all these cute little printable games that are flying around Teacher's Notebook (TN) and Teacher's Pay Teachers (TpT).
So, here's one *TIP* for storing your printable games-----but first. Guess where it came from?!
Yep----one of my favorite teacher supply places----the Dollar Tree!
So you know it only cost $1!
What could it be that costs a dollar and can store my games in a really great way?
A shoe box? Nope---too bulky.
A basket? Nope---they don't have lids.
A zipper pencil pouch? YES!
I love using these zipper pouches to organize my printable games. They are just the right size for most things that I make or buy on TN and TpT. The clear pouch allows you to cut to size the cover page of the printable game so you know what is stored in the pouch. Don't let those cute cover pages go to waste!
Then, put all of your game pieces inside---voila! Sleek and neat storage that does not take up much space. Perfect!
In the bottom 2 pouches, you can see that there are not cover pages. The tiny cards on the left are labeled upper/lower case matching games for St. Patricks' Day.
The one on the right are story pieces for retelling Goldilocks and the Three Bears. I need to make a cover page for this!
Also---because most of my games/activities are theme related, AND I store most everything in themed binders....these can go right the corresponding binder---like this!
Want to know what ELSE you can use these zipper pockets for? Storing vocabulary cards! I am always changing out the vocabulary cards in all of my pocket charts throughout the room - at the ABC Center, the Writing Center, the Library Center, etc. Storing my story or themed related vocab cards in individual zipper pouches allows me to easily grab and go. No digging in a box or envelope, or rubber banding cards together.
Again, throw it in the themed binder - and everything is on one neat and tidy space!
Please click HERE if you want to browse around my shop!
To become a Facebook fan and stay current on tips, games, and what's happening with The Sweet Life of Teaching, click HERE! Invite your teacher friends and continue to help this blog grow!
PS - the Letter Match and Easter Egg Rhymes are FREEBIES at my shop! Go grab 'em!
I don't know about you, but I am itching to clean my classroom - big time! It's that time in the school year when everything has been used - A LOT, by little hands who like to play, play, play. Not that I will have any time before my students' last day of school, but I might be able to tackle a few projects here and there.
I recently just presented with a friend and colleague of mine, Tiffany, at the MiAEYC (Michigan Education Association of Education for Young Children). You can check out her great classroom blog at HERE! We had a great time presenting "File Cabinet Rebellion - Get Your Classroom Organized". Much of our research consisted of scouring the internet, Pinterest, and visiting great blogs and local classrooms, and organizing our own classrooms!
Organizing is my guilty pleasure---my "geek" thing to do! I thought I'd take a moment to share a bit of what I do for any of you Spring cleaners out there!
But first...take a peek at our ambush make-over for one of our First Grade teachers, Mrs. Jennings! We gave her a great jump on HER spring cleaning!
I just love her desk afterwards!
Everything has a place now!
I personally can't wait until the day I do not have to have a shared classroom---I would SO get rid of my desk. I used to not have a desk when I had my own classroom - and I loved it. I mean - what early childhood teacher really needs a desk any way?! We never have time to sit at it, and most of us struggle to maximize our space for our students and centers. BUT - even I want my desk to look like this! Which it currently does not.
I think it's important to always start with yourself and your teacher spaces when wanting to feel organized and put together. Even though I know you have it together - sometimes we feel like we do not---and that's in part to the busy days we lead and things just get tossed and piled up. There's simply NO TIME! I get it.
BUT - if you are feeling un-organized and overwhelmed - start with your teacher space. If you feel great about your space, you will feel more calm, put together, and fully prepared for each day. You will also begin to project that feeling to your students, too. We certainly expect our students to be calm, prepared, and organized----so we must model that just like we would model a great writing lesson.
If you are up for setting aside just a couple (okay - maybe 3) hours of your time...you could have a great space that looks like this, too! Here's a few tips on how to get this great space.
1. Visit the Dollar Tree. I'm up for organizing anything - especially if it only costs me $1/item!! SCORE! Grab everything you think you need to get organized (who cares if you buy too much---you will certainly use it later. Definitely buy more than you think you will need...I bet you will end up using it.)
Doing the FUN part first---shopping, labeling, etc. will get you in the mood to organize. It's the carrot hanging in front of you----striving for that finished product.
2. Come up with a labeling system. What will you use - chalk vinyl? address labels? Pre-printed labels? Be sure to use something colorful, visually appealing, and nice/neat looking. DO NOT label on the container with a sharpie in your own handwriting. It just looks messy. You are a professional----go for a polished look!
3. PITCH, pitch, pitch it! Trash anything that you do not need. And DONATE anything of value that you can part with. Have a student teacher, or a first year teacher in your building? They will not turn away freebies. Share your junk treasure.
First things first....your desk is probably filled with little misc. items: game pieces, things found in your carpet, dice, band aids, etc. Corral that stuff with a little "Lost and Found" box on your desk - or somewhere in your classroom. Encourage your students to not hand you a bazillion microscopic game pieces, sequins, and dice 50 times per day. Simply have them drop it in the Lost and Found. From there, you can put everything back where it belongs daily or weekly. I suggest daily---it will take 5 minutes. Have older students? Make this part of your classroom helper responsibilities.
This box cost $1....at....you guessed it----the DOLLAR TREE!
Grab some typical lock-n-seal tupperware at the Dollar Tree! $1/each. Oh Yeah!
Slap on a chalk vinyl label---and you can easily change the contents and label anytime.
It's by far the best labeling system----my new trendy favorite!
Again - great little interlocking tiny blue bins found at the Dollar Tree. $1 for a set of 3!
Always, always have a daily drop box - a place for things to land that need to be filed, graded, put away, etc. The key is to empty it DAILY and put things in their rightful place. It only takes a few moments---and you will feel great walking to your desk each morning, knowing there are not yesterday's leftovers waiting for you. Just Git-R-Done!
I have LOTS more cleaning and organizing tips up my sleeve....so stay tuned! I should probably do a weekly feature. But as to not get overwhelmed, you must choose one space, and start small. Your teacher space would be a great place to start your spring cleaning! Go ahead....take one last look and be inspired and motivated!
Drop me a comment/picture of your before/after desk make-overs!





 Posts
Posts


